If Google has brought you here, then you must be knowing what is Time Lapse photography (<– Yes this link takes you to Wikipedia). I won’t explain it here as the Wikipedia link provides great explanation. I had read about it many times on the internet, but was not able to get an idea for my first time-lapse video. 3 weeks back I was watching this video. In this video the presenter talks about frame rate, time, etc. and that is how I got the idea to create my first time-lapse video.
Preparation of Basic Things for Time Lapse Video
I started looking for things in my house which will together look as a living room table. The most important thing I needed was a Table Clock. I arranged all things in my living room, set up my tripod and camera (of course!). I removed the batteries from the clock because the randomly moving second-hand was not a good idea.
After the arrangement was done, I took a sample picture to get idea of camera settings that I will need. I set my Camera to Manual Mode and started taking pictures one by one. I manually changed the position of Minute and Hour hand because I didn’t have 12 hours to shoot it!
As I was having Clock as my main focus in the video, I was looking for that “Tick Tock” sound. After searching on internet for 15-20 minutes, I decided to record it myself. I used this Android app called Smart Voice Recorder. It is very easy to use and customizable as well. You can set the sensitivity of mic to record the sound.
The Actual Work
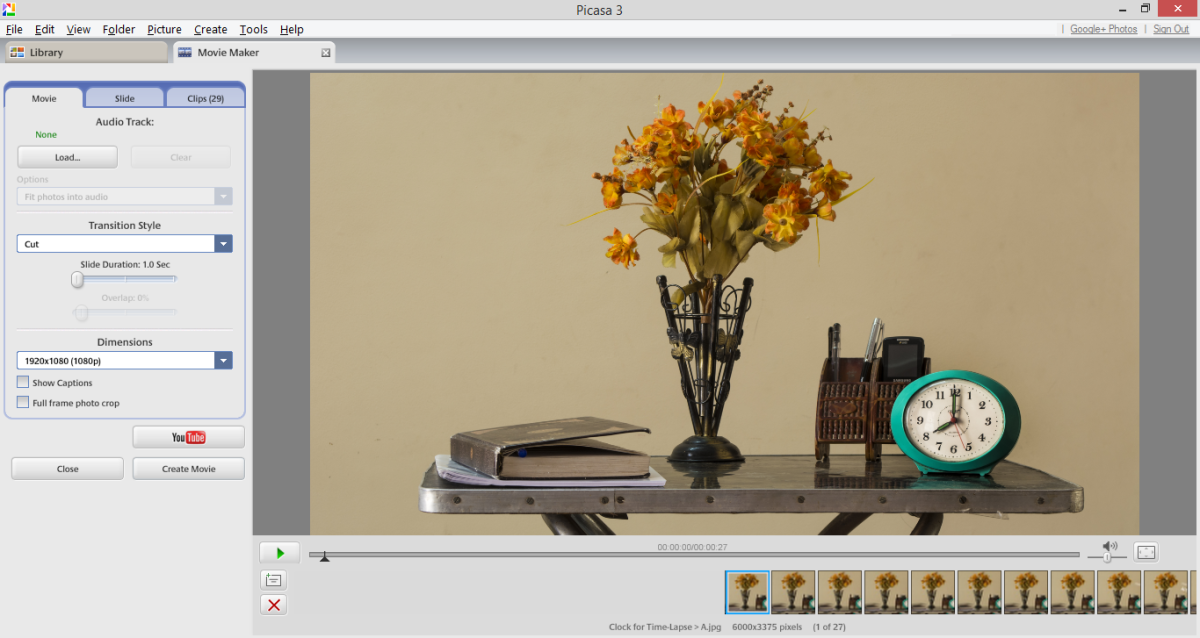
After taking series of pictures (23 to be precise) I was ready with the basic ingredients required for my Time Lapse video. In most of the videos, articles people were using Photoshop and many other softwares for making the video. I made it using Picasa. Yes, pocket friendly, easy to use software Picasa. I agree that it has only basic features, but for this video it was enough for me. This is how I did the software work.
1] I did a small color, exposure, cropping etc. adjustment to the pictures.
2] Then I copied all the selected pictures to one folder and renamed them in the order of A, B, C,…. where A being the first image and so on.
3] In Picasa, I selected all the image in the folder. Open Create -> Movie -> From Selection… and there you have it.
4] Here you can load sound for video, set frame rate, transition (if required), etc.
5] I added the last image multiple times with some text on it.
6] Finally I clicked on “Create Movie” to export it as WMV format. (Yes, Picasa exports the videos in this format only).
Few things I learnt about making Time Lapse video
1] You should keep your camera, tripod position same throughout the shooting. Even a small change in position might wash out your earlier work.
2] The same thing applies for your subject if only few things are moving in you video while other should stay steady, something like what I did.
3] You should set camera settings in a way to get proper output for each image. This again depends on your subject. For me, I had to shot each image with same exposure and frame. If you are making video where you have to capture images at daytime and at night, your camera settings of course will differ.
4] Patience is key to good Time Lapse video!
And finally here is the video that I created. Do let me know your opinion. Also, post links to videos you might have created in the comments.


